
Light Fixture Installation Manual: A Comprehensive Guide
This manual, crafted with insights from a seasoned home inspector, provides detailed guidance for safe and effective light fixture installations, enhancing your home’s ambiance․
Safety First: Essential Precautions
Prioritizing safety is paramount when undertaking any electrical work, including light fixture installation․ Always disconnect power at the breaker box before commencing work to avoid electric shock․ Verify the power is off using a non-contact voltage tester․
Wear appropriate personal protective equipment (PPE), including insulated gloves and safety glasses․ Never work with wet hands or in damp conditions․ If you are uncomfortable with electrical wiring, or unsure about any step, immediately consult a qualified electrician․
Ensure the fixture is properly grounded to prevent electrical hazards․ Follow all local electrical codes and regulations․ Incorrect installation can lead to fire or injury, so proceed with caution and diligence․
Tools and Materials Checklist
Before beginning your light fixture installation, gather all necessary tools and materials to ensure a smooth and efficient process; Essential tools include a screwdriver set (flathead and Phillips), wire strippers, wire connectors (wire nuts), electrical tape, and a non-contact voltage tester․
You’ll also need a ladder or step stool for safe access, pliers, and potentially a drill with appropriate bits for mounting․ Materials required encompass the new light fixture itself, suitable mounting hardware (screws, brackets), and replacement wire if needed․
Don’t forget safety glasses and gloves! Having everything readily available minimizes interruptions and promotes a safer working environment․
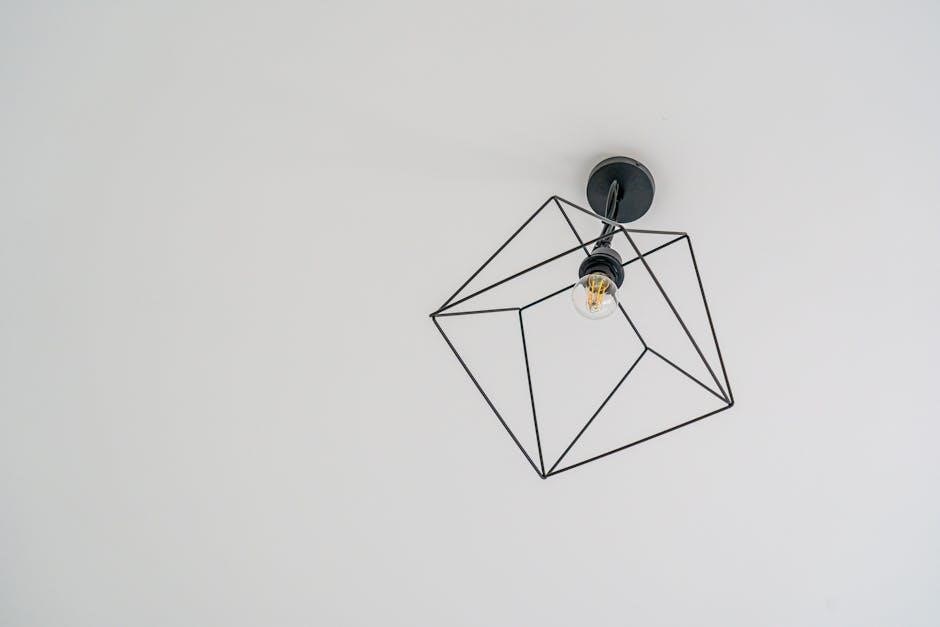
Understanding Different Light Fixture Types
Selecting the right fixture impacts both aesthetics and functionality․ Familiarize yourself with common types before installation․ Flush mount fixtures sit directly against the ceiling, ideal for low ceilings and general illumination․
Semi-flush mounts offer a slight gap, providing a softer glow; Pendant lights hang from the ceiling, perfect for focused lighting over islands or tables․ More elaborate, chandeliers create a dramatic statement, requiring sturdy ceiling support․
Consider room size and desired ambiance․ Understanding these distinctions ensures you choose a fixture that complements your space and simplifies the installation process․
Flush Mount Fixtures
Flush mount fixtures are a popular choice for many rooms due to their simplicity and affordability․ These fixtures attach directly to the ceiling, creating a clean, streamlined look․ Installation typically involves connecting wires within a junction box and securing the fixture with screws․
They are best suited for rooms with standard or low ceilings, as they don’t significantly reduce headroom․ Ensure the junction box is rated to support the fixture’s weight․ Proper wiring is crucial; always double-check connections before restoring power․
Flush mounts provide general ambient lighting, making them ideal for bedrooms, hallways, and kitchens․

Semi-Flush Mount Fixtures
Semi-flush mount fixtures offer a balance between flush mounts and chandeliers, providing more decorative appeal while still being relatively easy to install․ Unlike flush mounts, these fixtures have a gap between the ceiling and the fixture itself, often showcasing a decorative element like glass or fabric․
Installation is similar to flush mounts, involving wiring connections within a junction box and secure mounting․ However, semi-flush mounts may require a slightly more robust junction box due to their weight․ They are a great option for rooms with slightly higher ceilings․
These fixtures provide a more substantial light output and can serve as a focal point in a room․
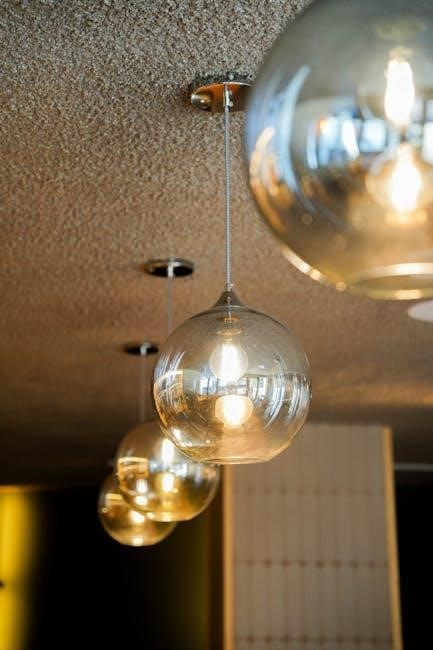
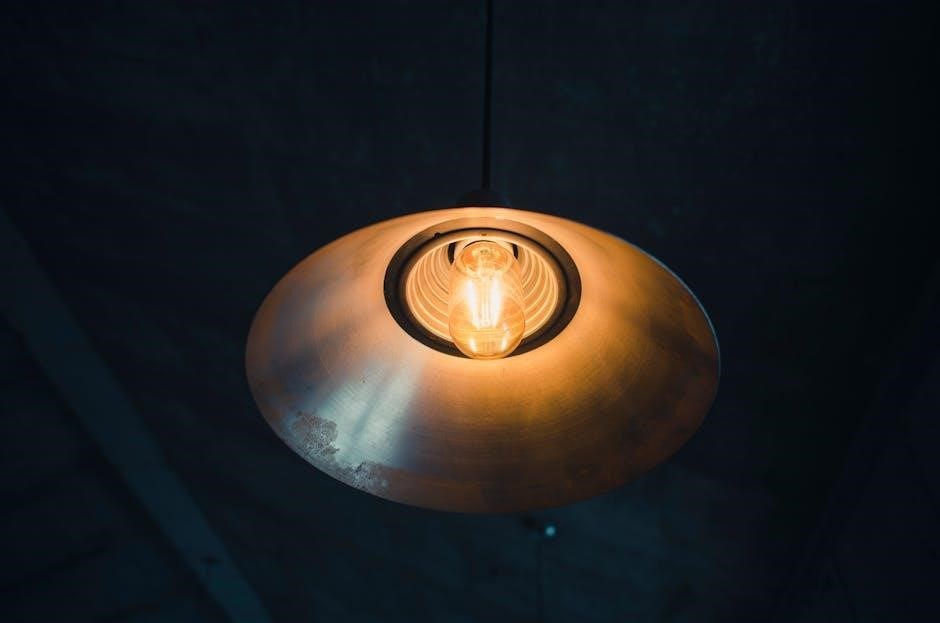
Pendant Lights
Pendant lights are versatile fixtures suspended from the ceiling by a cord, chain, or rod, offering both functional illumination and decorative flair․ They’re commonly used over kitchen islands, dining tables, or in entryways, providing focused light where needed․
Installation requires careful consideration of ceiling height and desired hanging length․ A secure mounting bracket is crucial, as pendants rely entirely on this support․ Wiring connections are similar to other fixture types, but the weight of the pendant necessitates a properly rated junction box․
Pendant lights come in a vast array of styles, allowing for customization to complement any décor․
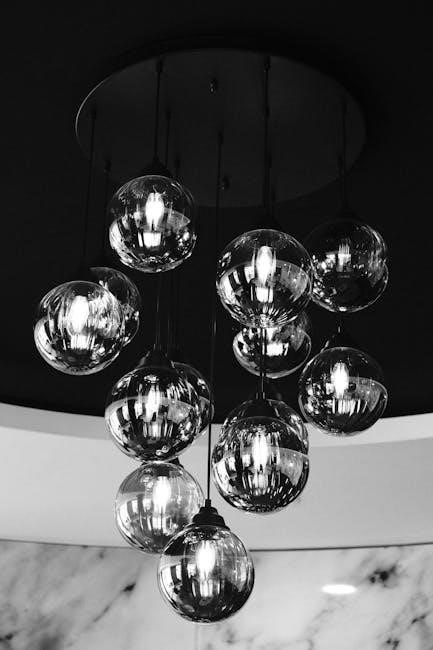
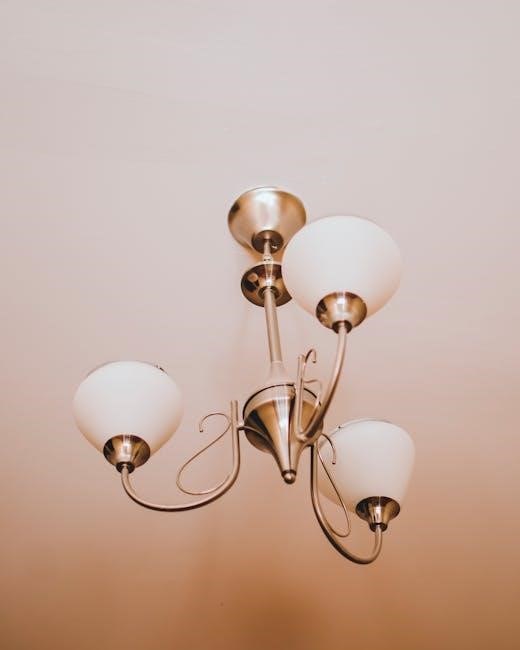
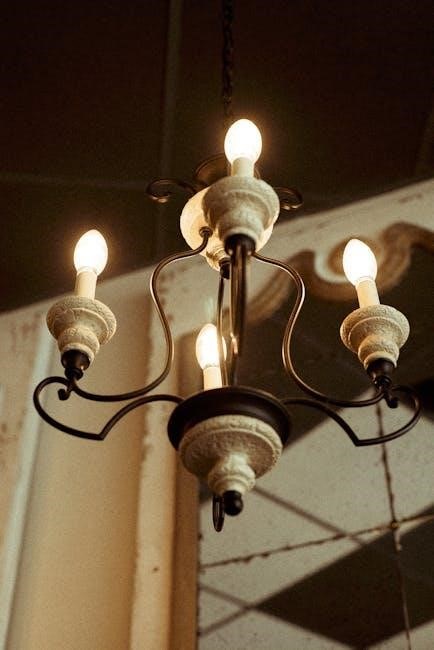
Chandeliers
Chandeliers represent a statement piece, adding elegance and grandeur to any room, typically dining rooms or entryways․ However, their installation demands extra caution due to their weight and complexity․
A robust, ceiling-mounted support box is absolutely essential – standard junction boxes are often insufficient․ Professional installation is highly recommended, especially for heavier chandeliers․ Careful wiring is paramount, ensuring all connections are secure and properly insulated․
Before installation, meticulously inspect all components and follow the manufacturer’s instructions precisely․ Balancing the chandelier during mounting is crucial for a safe and aesthetically pleasing result․
Preparing for Installation: Powering Down
Before commencing any light fixture work, absolute safety is paramount; therefore, completely disconnect the power supply․ Locate the circuit breaker controlling the fixture and switch it to the “OFF” position․ Do not rely solely on the wall switch – this is a critical safety oversight․
Verify the power is off using a non-contact voltage tester; Touch the tester to the wires at the fixture location; if it lights up or beeps, the power is still active․ Repeat this test to confirm a complete power disconnection․
Inform other household members that you are working on the electrical system to prevent accidental reactivation of the circuit․
Removing the Old Fixture
With the power safely disconnected, begin removing the existing light fixture․ Carefully unscrew the fixture from the ceiling or wall, supporting its weight with one hand to prevent strain on the wiring․ Observe how the fixture is mounted – noting the screw types and bracket configuration will aid reinstallation․
Gently lower the fixture, exposing the wire connections․ Before disconnecting any wires, take a photograph of the wiring configuration for future reference․ Disconnect the wires one at a time, using a screwdriver or wire connector removal tool․
Inspect the junction box for any damage and ensure it’s securely mounted․
Wiring Basics: Identifying Wires
Understanding electrical wiring is crucial for a safe installation․ Typically, you’ll encounter three main wires: Hot (Live), Neutral, and Ground․ The Hot wire, usually black or red, carries the electrical current․ Always treat it with extreme caution! The Neutral wire, typically white, provides a return path for the current․
The Ground wire, often bare copper or green, is a safety feature, directing stray electricity to the ground, preventing shocks․ Never disconnect the ground wire! Use a voltage tester to confirm wires are de-energized before handling․
Double-check local codes for specific color-coding requirements․
Hot (Live) Wire
The Hot, or Live, wire is the conduit for electrical power from the breaker panel to the light fixture․ It’s typically black or, sometimes, red, and carries a potentially dangerous voltage․ Extreme caution is paramount when working with this wire! Always assume it’s energized until verified otherwise with a reliable voltage tester․
Before any installation or removal, completely disconnect power at the breaker box․ The Hot wire connects to the fixture’s hot wire, usually identified by a similar color․ Incorrect connection can cause shorts, fires, or electrical shock․ Proper insulation and secure connections are vital․
Neutral Wire
The Neutral wire completes the electrical circuit, providing a return path for the current․ It’s typically white or gray and, while carrying less risk than the Hot wire, should still be treated with respect․ Never assume a wire is safe based on color alone; always verify with a tester․ The Neutral wire connects to the fixture’s neutral wire, also usually white․
A secure connection between the Neutral wires is crucial for proper fixture operation․ Loose connections can lead to flickering lights or even electrical hazards․ Ensure the wire is firmly attached within the wire connector․ Always double-check your connections before restoring power to the circuit․
Ground Wire
The Ground wire is a vital safety component, providing a path for electricity to flow safely back to the electrical panel in case of a fault․ Typically bare copper or green, it’s connected to the grounding screw in the electrical box and the fixture’s ground terminal․ Proper grounding minimizes the risk of electric shock․
Even if a fixture appears to be plastic, grounding is still essential․ The metal mounting bracket requires a ground connection․ Never bypass the ground wire; it’s a critical safety feature; Ensure a secure connection using a wire connector or grounding screw․ Always verify grounding with a tester before energizing the circuit․
Connecting the New Fixture: Step-by-Step
Begin by carefully stripping about ¾ inch of insulation from the ends of each wire – hot, neutral, and ground․ Twist the strands tightly to ensure a solid connection․ Using wire connectors (wire nuts), securely join the fixture’s wires to the corresponding house wires: black to black (hot), white to white (neutral), and green or bare copper to green or bare copper (ground)․
Ensure each connection is tight and no bare wire is exposed․ Gently tug on each wire to confirm a secure hold․ Carefully tuck the connected wires into the electrical box, ensuring they aren’t pinched or strained․ Proceed to mounting only after verifying all connections․
Mounting the Fixture Securely
With the wires safely tucked, align the fixture’s mounting bracket with the holes in the electrical box․ Secure the bracket using the screws provided, ensuring it’s firmly attached to the box – a wobbly bracket compromises safety․ Carefully raise the fixture and align it with the mounting bracket․
Gently push the fixture onto the bracket and secure it with the appropriate screws or nuts․ Do not overtighten, as this could damage the fixture or the bracket․ Double-check that the fixture is flush against the ceiling or wall and doesn’t wobble․ A secure mount is crucial for preventing accidents․
Installing Bulbs and Shades
Before installing bulbs, verify the fixture’s wattage rating to prevent overheating and potential fire hazards․ Carefully screw in the correct type and wattage of bulb, avoiding excessive force․ Ensure the bulb is snug but not overly tightened․ Once the bulbs are in place, proceed to install any shades or globes that came with the fixture․
Follow the manufacturer’s instructions for attaching shades, typically involving screws, clips, or twist-lock mechanisms․ Handle glass shades with care to avoid breakage․ Securely fasten all components, ensuring they are stable and won’t fall․ Properly installed bulbs and shades complete the fixture’s aesthetic and functionality․
Testing the Installation: Powering On

After meticulously completing the wiring and mounting, it’s time to cautiously test the installation․ Locate the circuit breaker controlling the light fixture and switch it back to the “on” position․ Observe the fixture carefully for any sparks, smoke, or unusual sounds – immediately switch the breaker off if any occur․
If all appears normal, turn on the light switch․ The fixture should illuminate steadily without flickering․ If the light functions correctly, congratulations! You’ve successfully installed your new light fixture․ If issues arise, refer to the troubleshooting section for guidance before proceeding․
Troubleshooting Common Issues
Encountering problems after installation is common․ Let’s address a couple of frequent issues․ If the fixture doesn’t turn on, double-check the circuit breaker and ensure it hasn’t tripped․ Verify all wire connections are secure and correctly matched – hot to hot, neutral to neutral, and ground to ground․
Flickering lights often indicate a loose wire connection․ Carefully inspect each connection and tighten as needed․ Incompatible bulbs or a faulty dimmer switch can also cause flickering; try a different bulb or bypass the dimmer․ If problems persist, consult a qualified electrician for assistance․
Fixture Doesn’t Turn On
A non-illuminating fixture is a common frustration, but often easily resolved․ First, verify the circuit breaker controlling the light hasn’t tripped․ Reset it if necessary․ Next, meticulously check all wire connections within the fixture and the junction box․ Ensure the hot (live) wire is securely connected to the fixture’s hot wire, and the neutral wires are similarly paired․
Confirm the bulb is properly seated and functioning – test with a known working bulb․ A loose connection, even slightly, can prevent power flow․ If these steps fail, carefully re-examine the wiring diagram and consider seeking professional help․
Flickering Lights
Persistent flickering can indicate several issues, ranging from simple to complex․ Begin by ensuring the bulb is securely tightened in its socket; a loose bulb is a frequent culprit․ If the flickering continues, inspect the wire connections within the fixture and junction box for looseness or corrosion․ Loose connections interrupt the electrical flow, causing the light to waver․
Dimmer switch compatibility is crucial – ensure the fixture and bulbs are rated for use with the dimmer․ Faulty dimmer switches can also cause flickering․ If problems persist, a failing fixture or a more significant electrical issue may require a qualified electrician’s attention․
Ceiling Fan Light Kit Installation
Installing a light kit onto an existing ceiling fan enhances functionality and aesthetics․ First, ensure the fan is powered off at the breaker․ Carefully detach the existing fan cover plate, exposing the wiring․ Connect the light kit’s wires – typically blue to blue (live), white to white (neutral), and green or bare copper to green (ground) – using wire connectors․
Securely mount the light kit base to the fan, following the manufacturer’s instructions․ Install the light bulbs and glass shades․ Double-check all connections before restoring power․ A properly installed light kit provides focused illumination and complements the fan’s cooling capabilities;
Dimmable Fixtures: Compatibility and Installation
Utilizing dimmable fixtures allows for customized ambiance and energy savings, but requires careful consideration․ Not all bulbs and dimmers are compatible; LED and CFL bulbs often necessitate specific dimmer switches designed for low-wattage loads․ Verify compatibility before installation to prevent flickering or premature bulb failure․
When installing, connect the dimmer switch according to its wiring diagram, typically replacing the existing on/off switch․ Ensure the dimmer’s wattage rating exceeds the fixture’s total wattage․ Testing after installation confirms proper dimming functionality and a smooth, flicker-free experience, enhancing your home’s lighting control․
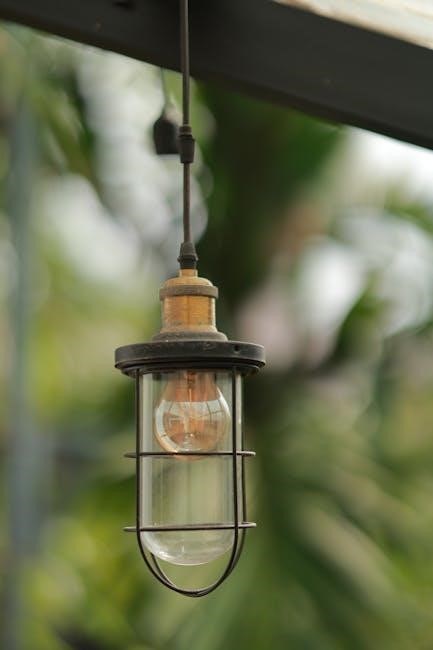
Outdoor Light Fixture Installation Considerations
Installing outdoor lighting demands extra precautions due to weather exposure․ Fixtures must be rated for outdoor use, indicated by a “Wet Location” or “Damp Location” label, ensuring resistance to rain, snow, and humidity․ Utilize weatherproof junction boxes and silicone caulk to seal all connections, preventing water ingress and corrosion․
Ground Fault Circuit Interrupter (GFCI) protection is crucial for outdoor circuits, safeguarding against electrical shock․ Consider the fixture’s placement, avoiding direct exposure to sprinklers or pooling water․ Proper sealing and GFCI protection are vital for safe and reliable outdoor illumination, enhancing security and curb appeal․
Understanding Electrical Codes and Permits
Before commencing any light fixture installation, familiarize yourself with local electrical codes and permit requirements․ These regulations ensure safety and compliance with established standards, protecting both you and your property․ Many jurisdictions require permits for electrical work, even seemingly simple fixture replacements․
Contact your local building department to determine if a permit is necessary and to understand the specific code requirements in your area․ Ignoring these regulations can result in fines, insurance complications, and potential safety hazards․ Adhering to codes guarantees a safe and legally compliant installation, providing peace of mind․
Maintaining Your Light Fixtures
Regular maintenance extends the lifespan and optimal performance of your light fixtures․ Dust accumulation significantly reduces brightness, so clean fixtures monthly with a soft, dry cloth – avoid abrasive cleaners․ For intricate designs or glass components, use a gentle dusting spray and a soft brush․
Periodically inspect wiring connections for looseness or damage, and tighten as needed (with power OFF!)․ Check bulb sockets for corrosion and replace them if necessary․ Proper care not only enhances aesthetics but also prevents potential electrical hazards, ensuring long-term safety and efficiency․
When to Call a Professional Electrician
While many light fixture installations are DIY-friendly, certain situations demand a qualified electrician’s expertise․ If you’re uncomfortable working with electrical wiring, or encounter any issues beyond your skill level, prioritize safety and seek professional help․
Specifically, call an electrician for complex wiring configurations, aluminum wiring concerns, or when dealing with older homes with potentially outdated electrical systems․ Any signs of sparking, burning smells, or frequently tripping breakers necessitate immediate professional attention․ Ignoring these warning signs can lead to fire hazards or electrical shock․
Warranty Information and Support
Your new light fixture is backed by a manufacturer’s warranty against defects in materials and workmanship․ The warranty period typically ranges from one to five years, covering component failures under normal use․ Please retain your proof of purchase, as it’s required for all warranty claims․
For warranty support, contact the manufacturer directly through their website or customer service hotline․ Detailed contact information is included in the product packaging and often available online․ Beyond the warranty, many manufacturers offer helpful online resources, FAQs, and installation guides to assist you․ Don’t hesitate to utilize these support channels!